Archive for January, 2011

Leaf motif

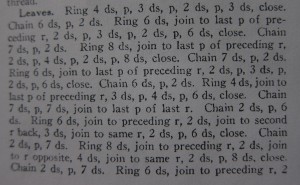
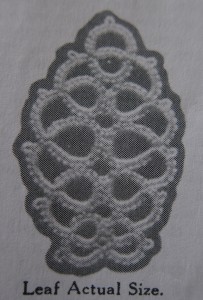
I started work on a large piece that I was going to write up today, but since it still has a fair amount of tatting left I decided to put it aside and work up this quick motif.  This little leaf has been catching my eye every time I flip past it on page 15 of Priscilla Tatting Book #3.  It’s part of the large centerpiece on page 14 and I’ll get to the centerpiece eventually, but today I just wanted to tackle this leaf.  I keep seeing it as a petal and want to try making some flowers out of it eventually.

For the size of this simple-looking leaf it has some mightly long directions.  This is the sort of pattern that makes you crave a diagram.  It would be so much easier to follow.  I didn’t even try to start tatting directly from the book.  Before even attempting it, I wrote out the pattern in shorthand so I could have it in front of me while looking at the picture.  It’s still sort of a pain in the butt to follow since every ring is different (well, one half of the leaf is the mirror image of the other, but since there’s joins on the second half that aren’t there on the first half, even in the shorthand version you have to write out each ring and chain separate.

Here it is:

R 4-3-2-3

Ch 6-2

R 6+2-3-2-6

Ch 7-2

R 8+2-4-2-8

Ch 7-2

R 6+2-3-2-6

Ch 6-2

R 4+3-4-6

Ch 7-7+(to last ring, I recommend a shuttle join) 2-6

R 6+(to last ring) 2+ (to opposite ring) 3+ (to second picot on opposite ring) 2-6

Ch 2-7
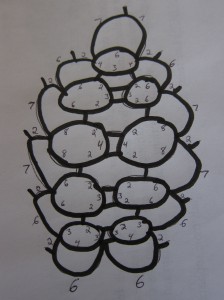
R 8+(to last ring) 2+ (to opposite ring) 4+ (to second picot on opposite ring) 2-8

Ch 2-7

R 6+(to last ring) 2+ (to opposite ring) 3+ (to second picot on opposite ring) 2-6

Ch 2-6

R 3+ (to last ring) 2+ (to opposite ring) 3+ (to second picot on opposite ring) 4

Ch 6-2 + (to base of first ring made) tie and hide ends

Still annoying to follow, huh?  Fortunately for you, I decided to make a drawing.  Unfortunately for you, I’m not very good at drawing.  Sorry about that.  Hopefully it’s still a little helpful.  (Click on the picture once and it will take you to a window with just the picture where if you click on it again it will zoom in.)

One thing that annoyed me when I finished is that because the last chain has only 2 stitches after the last picot there was no place at the end for me to use the magic thread trick to hide the ends.  You can maybe see in the picture below that I just tied and cut them since this was just a practice round.  When I started tatting it from the pattern I didn’t even take the time to figure out which ring I was starting with, I just did it like a tat-it-and-see and didn’t worry about the end.  Looks like if I want to hide my ends I’m going to have to plan ahead and put in a magic thread in either the first ring or chain.  I think it would probably show less in the ring.  A little annoying since I don’t like to have a magic thread hanging out while I’m tatting.  I’m always worried it will slip out, but I guess that’s what I’ll need to do for this pattern.
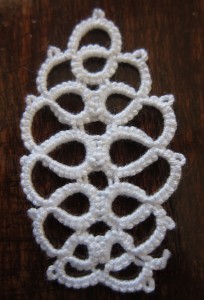
I love those little picots on the chains though.  I’m not usually much for decorative picots but those little ones really make a huge difference in leaf.  Gives the edges a more crisp feeling that sort of looks like an oak to me.  I also thought the double joins between the rings was interesting.  This motif seems a little more solid and stiff than most and I think that’s part of the reason why.  Gives the piece a little more structure which is nice.

Well, this is just a small section of the final centerpiece, but since there’s so many of these leaves (and the rose motif that I will tackle another day) I thought I might as well get started.  It will be good for me to have a large project that I can keep coming back to for those days when I want some tatting that will let me zone out and don’t want to work my way through a new pattern.  I’m not actually at the zoning out stage with these leaves though because I still need to figure out how to put them together with the roses for the final piece.  The instructions just say to make all the smaller motifs and “join” them.  I think that they’re using the term “join” generally, and not as a picot join so I guess that just means with a needle and (sewing?) thread.  Seems like there should be a more elegant way to do that, but I’m leaving that for another day.

Comments (3)

First Steps

The first Priscilla book is 33 pages, the second is 43 and the third is 32.  Then there’s also the yoke book from Priscilla which is both tatting and crocheting.  I don’t have it in front of me so I can’t count up how many pages of tatting it has.

It’s sort of hard to tell how many patterns there are on the 100+ pages without going through very carefully and counting.  The books are scanned and the pictures are from the early 1900.  A lot of the detail is lost and the division between patterns is shown just with a slightly large bit of text in the middle of a sea of text.  Ahh, what I wouldn’t do for a diagrammed pattern.

I have messed around with some of the larger projects before and had them sort of end up as a mess.  The patterns an written sometimes don’t match the pictures and even when they do seem to I’ve had trouble getting mine to come out the same or even just flat.  It’s probably in the blocking, but I feel like if you need to block a pattern to make it come out flat then you probably need to change the pattern first.  Blocking is for finishing, but once a piece is tatted it should have basically the right shape.

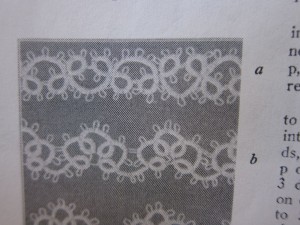
I’m really looking forward to wrestling with those larger patterns, but I wanted to start off with a few of the easier ones first.  It was the edgings on pages 7-10 of the 3rd book that made me first notice the Priscilla books so I’m starting with one on page 8, “Figure 24a” or as I’m calling it, the “Leaf Edging” since I think it looks like leaves on a vine.

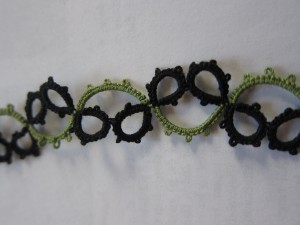
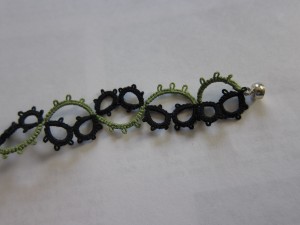
I decided a bracelet of this pattern would be a good way to finish off a bit of black Lizabeth thread in size 20 that I had left on a shuttle.  A magnetic clasp was perfect for it.

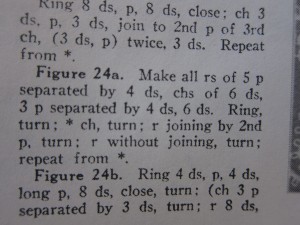
Here’s a picture of the instructions.  Nice and easy, right?  Written out in the more modern short hand they are:

R 4-4-4-4-4-4

Ch 6-4-4-6

R 4-4+4-4-4-4 (join 2nd picot to 4th picot of last ring)

Shoelace trick (my addition, see note below)

Repeat from the beginning, until you’ve reached the desired length then tie and hide ends.

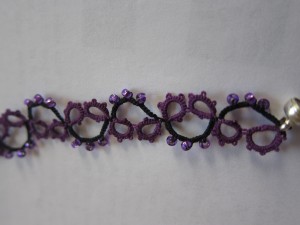
I didn’t think I’d learn much from such a simple looking pattern, but of course, I did.  As written the instructions just say “turn” but I quickly found that just turning and working the second ring would simply leave the shuttle and ball threads crossed once I continued.  In addition to then giving the piece a front and back it also meant the sections would flip around and not stay in place.  This might not matter if you were going to take the finished project and sew it down as an edging, (in fact you might want to have a front and back in that case) but for a bracelet it didn’t work. (See the picture on the right.) a simple shoelace trick before the next ring took care of that and the different sections stay nicely in place now.

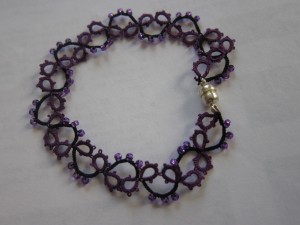
I liked this pattern so much I decided to try it with beads with the last bit of purple thread on a shuttle from an earlier project. It’s hard to tell because the purple is so dark, but the rings are purple and the chains are black with purple beads.

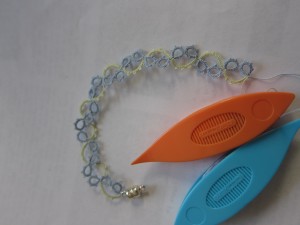
I think this will be a pattern I use a lot.  I especially like it as a quick project for finishing off the last bit of thread on a shuttle by using it as the chain color.  It doesn’t take much to do a bracelet and if I run out on the shuttle I can switch over to a ball to finish it off.  That’s what I’m doing with the third version below.  I had just a little bit left of the green (size 80) left on a shuttle and happened to already have the blue wound on another.  I think I just might be able to finish it with what’s on the shuttle, but if not I’ll switch to the ball.

With that, I’m 1 pattern down and couple hundred (?) left to go.  Stay tuned!

Comments (3)

An Introduction to the Priscilla Project

I’ve been toying around with the idea of a larger tatting project for a while.  I have a habit of reverting back to redoing the same patterns or variations of the same patterns and have been wanting to stretch my tatting skills more but my OCD tendencies are craving a systematic way of doing that.

And thus the idea for the Priscilla Project was born.

As far as I have found, there are 3 full length books and one shorter pamphlet (on yokes) on tatting from the Priscilla Publishing Co. with the first book published in 1909.

I’m not sure why I’ve gravitated to the patterns in the Priscilla books over some of the other great antique tatting patterns out there, but I just love them.  (Especially the third book)  However, actually tatting from them has been both rewarding and frustrating.  The close-up pictures never seem to be of the part of the piece that’s giving me trouble.  The directions are often vague and sometimes wrong.  But the pictures show some incredible pieces and a lot of techniques that I always thought were newer inventions.

As soon as I got my printed copies bound it started feeling like a real project that I could tackle.  Now I have flipped through and drooled over the books enough.  Time now to start tatting.

I have no idea if I’ll eventually end up tatting all the patterns.  The OCDness in me wants to make that as a goal, but my more practical side is reminding me that I’m also a working grad student and that even if I weren’t, working (and likely re-working and re-working again) the patterns would take years.  Plus I’ve got other projects going on in my life (both with and without thread and shuttles).  Who knows?  In a year or two I could get sick of attempting to read the tiny print.

So as I start off I set no goals for this project.  Or rather, for right now, the goal is simply to explore these books more and to document the process as much as my time will allow.

I suspect that a few of the the patterns will leave me baffled, frustrated and confused.  But I can tell just from flipping through the books that it’s also going to be a lot of fun.

If you’re interested in exploring the books with me, print out your own copies of these awesome books.  You can find them online at the Antique Pattern Library, a great resource for all sorts of antique lace patterns of all sorts of techniques. Or if you want a more compact list of just tatting books, check out the InTatters.com selection of antique tatting patterns (These are mostly pulled from the Antique Pattern Library, but this site saves you time by only listing tatting books.)

Enjoy!

Comments (3)

Happy New Year!

2010 went out with a whimper when I got a migraine and went to bed early.  2011 started off much better when I woke up to a clear head and a sale on Etsy.  Yay for 2011! Hopefully both are trends that will continue for the rest of 2011.  I’m celebrating the new year with 20.11% off all bracelets in my Etsy shop as January’s Sale of the Month.  I’ve been listing lots of bracelets lately and still have more to go because I was able to take pictures with my second cousin last week.  My arms are too hairy for pictures, but hers are lovely.  Thanks Mary!

Our family was finally together long enough to open presents so we celebrated Christmas this morning.  I’ve got some new teas to try out so I think January 1st will be a nice relaxing day, finishing up a pair of wedding fingerless gloves for a relist in the shop and getting started on my new super secret tatting project.  Won’t be secret for much longer as I’ll be announcing it here, but the enormity of it has been giving me butterflies.  It’s also sort of the reason for this blog.  All will be revealed soon.

Hope your 2011 is off to a good start!

Leave a Comment