Archive for January, 2011

More of the Baby Bonnet

This will be a quick post as I have a very busy week with my current class.  The final is on Saturday so wish me luck!  This class (Advanced Financial Accounting) is supposed to be the most difficult class in the accounting masters program so I’ll be glad to be done with it.  They say the rest of the program is just as much work, but it’s less confusing.  I actually thought the intermediate classes were harder, but that’s mostly because they encompassed so MUCH material.  In this one it’s harder stuff, but less topics so we got to spend a bit more time with each.

Anyway.  You don’t care about accounting and for the next fifteen minutes or so while I write this post, I don’t care about it either.

Today is basically a little progress report on the bonnet.  I’ve done a second wheel motif and one of the small negative space fillers that connects both. However, I just noticed that I joined the space filler to the wrong rings of the wheels.  I’ll have to cut it out and do it again, but I’ll post it anyway so you can get the idea.

The wheels are joined on two adjacent rings.  There are three picots at the top of each ring and I didn’t know if they were supposed to be joined using all three picots or just the center one.  (The directions are vague as usual.) I choose just the centers, but I think in the future I’ll join using all three just to make it stronger.  I’ll do the next one that way, at least, just to see what it looks like.  This first attempt at the baby bonnet will definitely just be a proof of concept version, so I’m not too worried about looks this time around.

I’m still trying to figure out exactly how long the picots on the first ring and the spaces between the rings should be.  I think the picots on the first ring definitely have to be longer than normal picots to get the inside round of rings to lay flat.  In the book it looks like the joining picots on the larger rings are longer and that might help sort out the length of thread between the rings.

The small bit of negative space filler is SUPPOSED to join to the two rings on the wheels closest to the rings that join the wheels together.  I didn’t have my book with me when I did it so I guessed and got it wrong.  The little space filler is just 4 unconnected rings of 6-6(- or +)6-6 with that picot vs join depending on which wheels you’ve got done.

That’s probably it for me until Monday.  I’ve got the final on Saturday and our research paper due Sunday at midnight so until then it will be mostly just accounting for me.

Leave a Comment

Start of the First Baby Bonnet

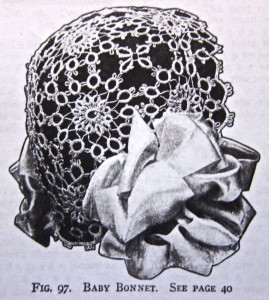
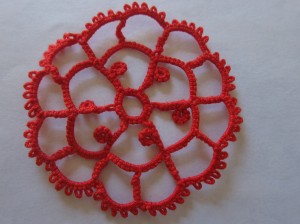
I’ve just started the first of 6 baby bonnets in the Priscilla books.  This one is in book #2.  I picked this one because frankly, it looked like it would be the fastest of them.  The others looked like they were made from a much smaller thread and for my first bonnet I wanted one that I could do over easily a couple times if I couldn’t get it right.

I’m usually not big on single shuttle tatting or leaving plain threads instead of chains, but for this I think it works.  The bonnet is made mostly of a circular motif.  (Seems I’ll be learning a lot of different circular motifs during the course of this Priscilla project.)

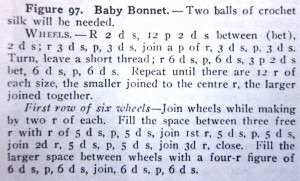
The problem is the book doesn’t actually tell you how many or what size thread to use.  The instructions say:  “Two balls of crochet silk will be needed.”  I’m not sure what size that translates into in modern day, but I’m trying it first in DMC size 10.  I picked that size just because it looked like the size in the picture, but having done the first round now I think perhaps I had an adult sized head in mind and not an infants.  I’m going to continue with the size 10 though just to see what happens.  Also, I think that with some adjustments it could be made into a wedding veil so I want to see what works for an adult-sized head.

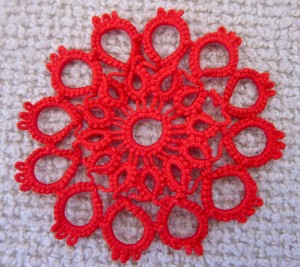
On to the wheel motif.  As usual, my main change is to use the continue thread method and climb out from the center ring to the second round.  In this case it’s a single shuttle pattern so I use made the first ring about 12 inches from the end of the ring and finger tatted the second half of the split ring that does the climbing out.

Leave at least a 12 inch tail, R 2(-2)x11.  Picots should be longer than normal joining picots.  (Forgive the the vagueness here.  I’m still trying to figure out how long they should be.  I think around a quarter of an inch.

Leave mock picot and tat split ring of 3-3/3-3 using the tail for the second half

Leave at least a 1/4 inch thread between all rings.  (Sorry again for the vagueness.  Still working this out.)

Alternate large and small rings.  Join Large Rings to previous Large Ring.  Join first picot of Small Rings to previous Small Ring and second picot to the next picot on the center ring.

LR 6-6-2-2-6-6

*SR 3+3+3-3

LR 6+6-2-2-6-6

Repeat from * around center ring.  Join last Small Ring to first Small Ring.  Join last Large Ring to first Large Ring.

Tie thread to original tail and hide ends.

This is a easy motif that I can do while walking, so hopefully I’ll make fairly quick progress on the bonnet.  The next step is figuring out how the pieces fit together and then how (and when) to do the small motifs that fill the negative space.

The big bow on the bonnet in the picture looks nice, but it’s rather annoying since they don’t give very many instructions on how to put together the piece and the bow hides a big chunk of it.  They do say the first row is 6 wheels in a row joined by two rings each so I’ll start with that and then see what looks right when I get that far.

Comments (3)

Circular Motif for Yokes

Been focused mainly on making progress on a new custom piece. It’s for a belly dancer and one of my bracelet designs, but made bigger to fit around her upperarm.  I can’t wait to see what it looks like with the rest of her belly dancing costume.

I did take a break from that project today and finished up this awesome little circular motif from pages 5 and 6 of the first Priscilla book.  I used some of the blue thread left on my shuttles from the star doily and surprisingly, managed to have almost exactly the right amount left on the shuttle for it.  Love when that happens.

I also love the idea of a single join to two separate picots at the same time.  It’s something I’d been contemplating, but never actually tried and I think this is the first place I’ve seen it done.  I use the point on my shuttle rather than a crochet hook for my joins, but using a crochet hook would probably make this double join a lot easier.  It’s not a pattern that I’ll be able to do easily while walking (yes, I tat while walking and hiking) but I really liked the way this motif came out.

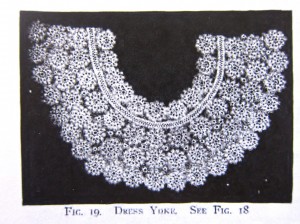
The book gives two yoke designs to use this motif for.  I haven’t decided if I’m going to do projects that big out of it.  Or rather, I doubt I’ll make a yoke, but may find some other large project for it.  I’m trying not to start any more large projects right now.  I’ve got enough going already so I want to finish a couple others soon.  For large Priscilla related projects I just want to focus on finishing the star doily and a baby bonnet from another Priscilla pattern that I’ve been eying and will probably start soon.

ANYWAY.  Let’s get on to awesome double-joining pattern for this motif, shall we?

Don’t be intimidated by the length of these directions in the book.  Most of them are for the finishing technique and for putting together two different yokes out of this motif.

I didn’t actually try the finishing technique, but I didn’t find it necessary.  The reason given for doing it is to make the motif come out flat and even without blocking.  My motif didn’t seem to need anything, but I did make it out of size 10 thread, so that might have made the difference.  The book called for size 50.

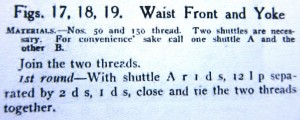
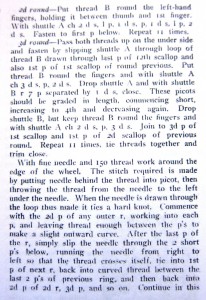
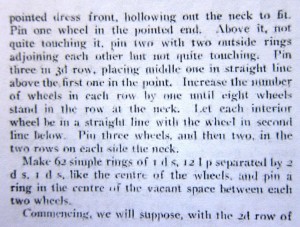
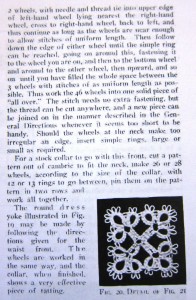
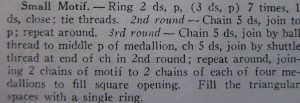
Here’s the instructions for the motif.  I’m including the pictures of the instructions for the finishing of the motif, but I didn’t do them on mine.  The only difference between the instructions as written and what I did was to climb out of the first ring with a mock picot rather than to cut and tie as they usually have you do.

Wind two shuttles using the CTM.

Round 1

With shuttle 1, R 2(-2)x11  Picots should be very long.

Round 2

Leave a mock picot,

*Ch 2-1-1-2 leaving the first half of the first stitch unflipped to lock the threads in place.

Shuttle join to next picot on ring.

Repeat from *, working your way around all picots of the center ring.  Last join of this round will be into the mock picot.

Join at the same time to both the first picot of the first chain and the last picot of the last chain.

** Ch 3-2

With Shuttle 2 (the same shuttle as made the stitches of the chains) R 1(-1)x7  Picots should increase in size until the 4th picot and then decrease in size.

Ch 2-3.  Shuttle join (Shuttle 1) to TWO picots of the previous round. Both the picot before and the picot after the previous round’s joins to the center ring.

Repeat from **, working your way round the motif.  Final chain should be joined to the last picot of the second round.

Hide ends and cut.

Here’s how mine came out:

So that makes the basic motif.  The instruction continue and want you to use size 150 (I think that’s the size of sewing thread) to weave around the motif.  This is suppose to give it shape, I guess.  I didn’t do that and not sure that it needed it, but maybe I’ll try it in the future.   The instructions continue and give you directions to make the two yokes below.

I don’t have any need for yokes.  I’m sure I’ll make more of these motifs and I like the way they look sewn together, but don’t know yet what I’ll actually make from them.  However, I’d like to make something that’s actually useful.  Ideas?

Comments (11)

Progress on the Star Doily

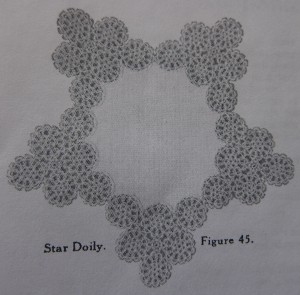
I’ve made a bit of progress on the star doily in the last couple days. Here’s the post about the original motif.

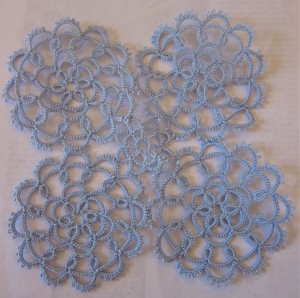
The new part in this project is the small motif used to fill the space between the larger motifs.  As written the pattern says to make the four motifs and then make the small motif, but it seemed a lot easier to make two of the large ones, then do the little one and then another two large ones.  Filling in small spaces just isn’t my idea of fun tatting.  Too fiddle-y.

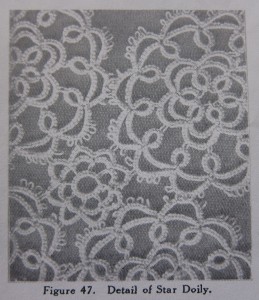
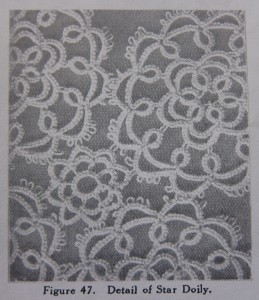
I made a second motif joining it to the first on the final round by the middle 3 of the 5 picots on an outer chain.  The book didn’t actually say how to do the join and from the look of the picture to the left I couldn’t actually tell how the original was joined, but I figured 3 joins would make it nice and strong.

I think the small motif would make an excellent small pendant or a pair of earrings.  Actually the center part of the large one would as well.  I’m adding these to my list of things to try when I have time.  The small motif is a fairly straight forward one.  My only slight confusion was to the first (and only) ring.  They call for you to tie the threads, but don’t say to cut.  Presumably they intended for you to cuqt them since that seems to be what was common at the time and they don’t then have you joining the thread to the first picot as I’ve seen them do.

Anyway, it’s a small matter because I just started the ring at a picot and left the shuttle on the ball.  After closing the ring I  made a mock picot after the ring by not flipping the first half of the first stitch of the first chain. (Wow, three firsts in one sentence.)  That seemed to do the trick as far as making sure there was a mock picot between the ring and the chain.

Here are the instructions as I did them (These instructions are for the motif alone.  For joining them to the large motifs you’ll just have to look at the picture above.  I can’t figure out how to explain where to make the joins and it’s one of those cases where a picture is worth a thousand words.):

R 3(-3)x7 (picots should be fairly long)

Round 2:

Leave space on threads after the ring of the same length as the picots.

*Ch 5, leaving the first half of the first stitch unflipped.

Shuttle join to next picot

Repeat from * 7 times around the ring.

Round 3:

**Ch 5-5 (joining were necessary to the large motifs previously made)

Shuttle join to top of next join on the previous round

Repeat from the ** 7 times.  Hide and cut ends.

Not too bad for a little motif.  I discovered after the second round that I’d made my ring picots just a little bit too short so it didn’t lie as flat as I’d like.  I’ll have to keep that in mind when I do the next 4.  Otherwise it came out pretty well.  I should have taken a picture after I finished the small motif but I forgot to do it until I’d finished another two of the large motifs and joined them to the group.  Here’s where I’m at this point:

And here again is what the finished doily will look like:

I can’t believe I’m actually making a doily.  I never thought I was that kind of tatter… ;)  Though I’m using size 10 thread so I think it’s going to come out pretty large.  MAYBE even large enough I can call it a tablecloth.  That seems more respectable than a doily.

Comments (6)

Square Insertion

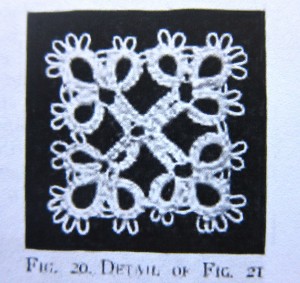
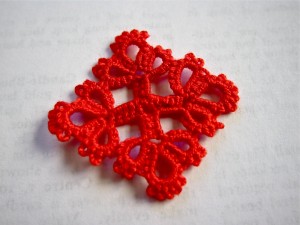
I wanted to do just a quick pattern today so I picked out the small square insertion on page 6 of the first Priscilla book.  I liked the right angles you get by joining all the chains up in one spot on the center.  I also liked that it worked up pretty quickly with the thread left on my shuttle from the earlier rose motif.  Here’s the instructions:

Use CTM

*R  6-2-1-1-4

R 4+2(-1)x4-2-4

R 4+1-1-2-6

CH4-4

Repeat from * 3 times, joining the first ring of each clover to the last ring of the previous clover.  Also join the chains to the first chain at the picot.

This might be the first time I’ve said this with regards to the Priscilla Project, but I didn’t have any changes to the pattern as written.  Well, unless you count the fact that I’m not going to make another 35 of these and sew them to a piece of fabric to use as a centerpiece.  Smaller pieces like this are starting to grow on me, but not enough to do another 35 of them.  I think adding a jump ring and turning this little motif into a pendant will be a fine place to stop.

Comments (7)

Starting the Star Doily

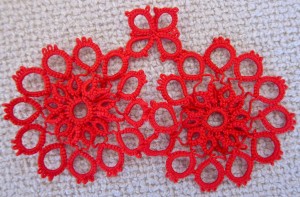
Today I started with the larger motif that builds into the star doily on page 13 of book 3. I’m a little partial to patterns with lots of chains because they mean you’re less likely to need to add more thread.  🙂 I’d been wanting to try a motif in which some of the rounds were simply chains that joined with the shuttle thread to the previous round. This was a fun little motif and with a split chain/split ring climb out from the inter part to the outer part it meant there was also no tying and cutting until the very end.
I did make a slight change to the very beginning. Instead of joining all the center rings to one large picot from the first ring I made each ring with two small (joining) picots and joined each ring to the previous one.  I don’t like making large picots with multiple joins to them because I never seem to get the size ring.  They’re either too small and bunch up or two big and loose.  Two picots means the center comes out looking a little neater and is a bit stronger to boot.   So where originally the center rings were 7-7 I made them 6-1-6 and they seemed to turn out fine.

Here’s the instructions as I tatted them:

Use CTM, leaving shuttle attached to ball

Round 1

R 6-1-6

CH 10

*R 6+1-6

CH 10 *

Repeat between *’s joining the 6th ring to the first and joining the last chain with a shuttle join to the top of the first ring.

Round 2

Ch 5-6-5, shuttle join to top of next ring, repeat chain around motif joining with a shuttle join at the top of each the next 4 rings.

Last chain is: CH 5-6 split chain of 5 (sorry I don’t know the shorthand for split chains).

Round 3

SR 7/7

CH 10

**R 7+7 (join to next picot on previous ring.)

CH 10**

Repeat between **’s, joining each ring to the next picot of previous round, all the way around. Join last chain with a shuttle join to the top of the first split ring.

Round 4

CH 4-2(x4)-4 ((5 picots separated by 2 stitches)), shuttle join ot the top of next ring, repeat chain around motif joining with a shuttle join at the top of each ring of the previous round.  Continue around motif then tie and cut ends.

You end up with a nice little round motif.  I made this one with size 10 thread.  I was a little disappointed that it turned out just a little bit too small to use by itself as a coaster.  Made from size 3 I think it would be prefect.  AND since it’s much heavier on the chains than rings I think it would tat up easily with size 3 and you probably wouldn’t have to worry about running out of thread on your shuttle.  I am adding it to my list of things to try later.  This list is getting rather long…

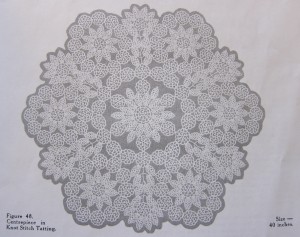
I’m also going to tat up the finished star doily that is described in the book.  There’s a little motif that I’ll also have to learn to connect the larger motifs, but that’s a project for another day.  From just looking at the picture of the finished doily I wasn’t sure how you were supposed to find a cloth that size or cut it to fit, but once I read the directions I saw it’s actually easier than I expected.  You tat and attach all the medallions to each other, sew them onto a large piece of cloth and then cut the cloth away.  Never knew it would be so easy.

Mom already said she liked the color of this first one so I think I’ll stick with the light blue.  One motif down, 29 to go, (plus the 5 little ones.)  More on this project later, but here’s the doily as it’s shown in the book:

Comments (5)

Finally Friday

Just a quick post today as I had class last night and haven’t done much tatting.  Did photograph and organize a couple pages of Priscilla book #1 so once I do the tatting from those pages I’ll be ready to post about them.  All my shuttles seem to be full so I’ll probably spend the weekend with little projects to finished off what’s on them and start fresh next week.  To that end I made another of the leaf motif bracelets from book #3 that I wrote about in my first post about the Priscilla project.  Seems so long ago.

I wanted to try the pattern in size 10 just so I would know how many repeats would be needed for a bracelet.  It would have been nice to know how much thread was needed too, but of course I didn’t think to measure the amount of thread on my shuttle before I started.  It was EXACTLY the perfect length.  I ended up with just a foot or so left, just the right amount for finishing the last ring.  I’ll have to try it again with a variegated thread so that I don’t need to measure the before and after, I can just count how many repetitions of the variegation it takes to finish.  That’s my lazy way of measuring thread.

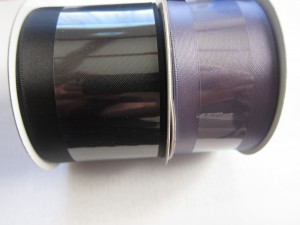
I did make it to Michael’s yesterday to check out what sorts of ribbon they have for the sash/belt.  Of course I forgot to bring the piece with me.  I found the thread I used on the shelf and tried to match the color, but nothing was quite right so I went with black.  Course since I didn’t have the piece with me, I totally got the size wrong.  The black ribbon to the right is about the width of the entire belt, not the loop at the end, but I think it will still work.   Good enough for a proof of concept anyway, and I like the idea of a big ribbon and big bow.   I got the purple to try to make another where the tatting goes directly onto the ribbon.  Haven’t picked out a pattern for that yet, but there’s lots of great edgings in the Priscilla book and I’m sure one of those will work great.

Comments (5)

Tatting Large Rings with Large Thread

Yesterday was a really busy day with work and getting ready for class tonight so I haven’t done much tatting in the last 24 hours, but I wanted to write about something I forgot to include yesterday in my post about the tatted belt. It’s probably not much of a new idea, but I figured it out while during that project and wanted to share it here.

The larger rings were made of 9 picots separated by 3 stitches for a total of 30 stitches in each ring.  Since I was using size 3 thread it meant that each ring took a fairly long length of thread.  I’m not sure how long exactly, but it got really annoying to constantly have to pull more thread through the stitches of the ring.  And as there were more and more stitches on the ring it took more and more pulling.  I could feel wrists tightening up everytime I had to do it and because it was hard to pull the thread through I had to keep stopping to do it.  (I couldn’t just do it with the fingers of my left hand like I can with a smoother thread and smaller ring.)

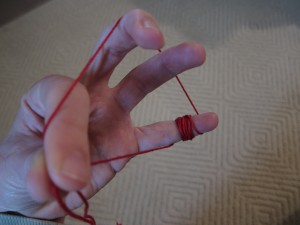
About half way through the project I realized I could wrap the shuttle thread around my pinky like I was making a chain, and then bring it around like a normal ring.  That way as I needed more thread to create the ring I already had it “inside” the ring and just had to unwrap it from my finger.  For the rings in this pattern I found I needed to wrap it around my finger about 10 times to finish the ring without having to pull anymore thread through.

Anyway, that’s all for today.  I just thought it was a handy little trick and hopefully it helps you as well if you ever decide to do a pattern with large rings with size 3 thread.

Comments (3)

Sash Belt (for lack of a better name)

This was one of the rare occasions where I picked a pattern based on a project and not the other way around.  I saw this listing on Etsy of a belt with a large bow in the back and wanted to do something similar in tatting.  (Here’s another cool example from the same designer.)  I wanted a piece of tatting in the front that would tie in the back with a large bow.

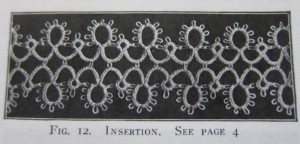
Because a belt is a fairly large piece of tatting I decided to do my proof-of-concept piece in size 3 thread.  That way it would work up faster and if it was a disaster I hadn’t spent too much time on it.  Size 3 thread meant finding a more simple pattern so I flipped through the Pricilla books and found this one on page 5 of the 2nd book.

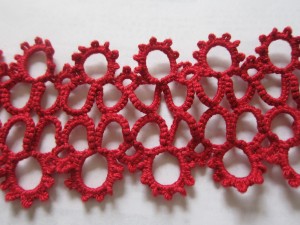
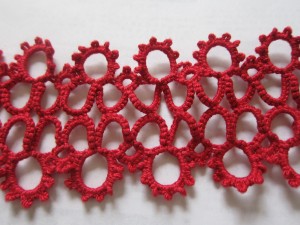
I figured that in size 3 thread this would work up large enough to make for a bold belt and I picked a nice bright red to give a bit of color to a white skirt I wanted to wear it with. My idea was to tat this pattern for the about 3/4th of the size of my waist and then add red sashes to the ends that would tie in the back.

Here are the instructions as written in the book.  In modern short hand they are:

*Ch 7-7

R 3-3-3-3

Ch 7-7

R 3(-3)x9*

Repeat between *s.  Make a second row that attaches the picots of the chains.

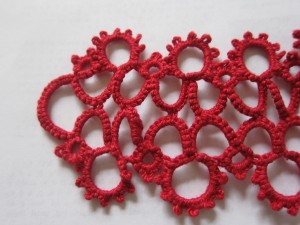
I don’t know who would actually want to start this pattern with a chain, so I started with the small ring and went on from there.  If I were redoing the pattern now I would make the chains shorter.  As you can see in the picture the chains sort of bunched up like there is too much curve in them for the short distance between the rings.  (I wonder if it would help if I didn’t tat the chains as tightly.)

One of the things I learned in Sharon’s tatting design course was that if you have a chain and rings pattern and you want it to stay flat you need to have the number of stitches in the chain equal the number of stitches in the sections of the rings that make up the top part of the negative space created by the rings and chain.  That’s a really complicated way to say it, but maybe if I explain it through this particular pattern.  The first ring has 3 stitches after the picot that will become the join.  The second ring has 3 stitches before the join.  Together that’s 6 stitches.  So if I wanted to do just one row of this pattern and wanted it to be straight I should have chains that connect the rings of only 6 stitches not 14 like this pattern calls for.

I wish I’d stopped and taken a picture before I’d finished adding the second row.  Without the second row the pattern has a tendency to curve in on the ring side.  (Which actually could be a pretty cool effect.  I could see joining picots of the large rings to make the pattern circle around… I’m going to have to try that.)

Anyway, the second row pulls it back and straightens it, but you can still see how it’s bunching in the front.  If I were to do this pattern again I’d probably try 5-5 for the chains to see if that would help.  Without the second row it would still bend but I think that with the second row it would work.  I could try 3-3 which according to the calculations above should keep it flat, but it would also take away some of the height of the pattern and I would want to keep that for the belt. When working the leaf motif yesterday I learned that joining two rings with two joins instead of 1 gives the piece more structure and makes it stiffer.  I wonder if that might work here too with chains of something like 5-4-5 and then 5+4+5.  Just something else to try sometime.

One of the things the book doesn’t mention is how to add on the second row.  I guess they just expect you to tie off the end of the first row and then start the second separately.  I didn’t want to do that because 1) Didn’t want to have to hide more ends than needed and 2) Wanted to create a loop to attach the sash part to later.  Pictured is my solution.  After the last ring of the row I did a chain of 20 unflipped double-stitches before starting up again with the first ring of the 2nd row.

I didn’t flip the stitches of this chain because I wanted it to curve into the rest of the tatting.  This created the loop that I’ll eventually use to attach the sashes.

As a side note here I didn’t start the first row at the end.  That doesn’t really make sense… When I was tatting the second row and was getting back to where I started I kept going and did an extra repeat so the last repeat of the second row made it longer than the first row.  Then I did the unflipped stitches of the end and did what would become the first repeat of the first row.  That way I was making the final knot and hiding the ends about an inch into the piece and not at the end.  I think that might make it a little stronger since it’s the end that’s going to have the most tugging on it when the best is tied.

This is as far as I’ve gotten on this project.  All the tatting is done, but I haven’t figured out how to do the sash part yet.  I’m hoping to find something at Joanns that I won’t have to adapt much because I’m not too fond of sewing.  If you have any ideas, please let me know.  I’ll share the finished piece here when I’m done.

Comments (2)

Rose Motif (From Hell)

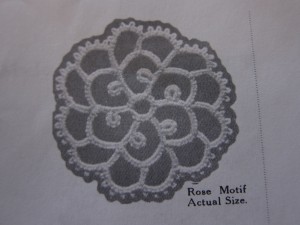
I’m also working on a large piece from the Priscilla books which is an easy pattern but which I’ve chosen to work up in a rather large project.  So I wanted to do a fairly easy pattern for today that wouldn’t take up much time. Since the leaf motif came together so easy on Tuesday I thought I’d do the pretty little rose that goes with it.

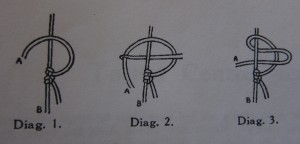
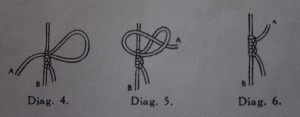
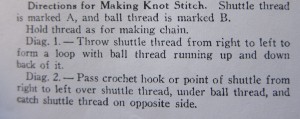
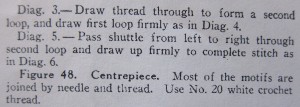
Yeah, that didn’t work out as well as I thought it would.  This unassuming little rose was more complicated than I expected. You see, this rose is the introduction to something Priscilla calls “Knot tatting.”  It’s basically their version of the split chain.  Here’s the pictures and written instructions for it, “A” is your shuttle thread, “B” is the ball thread or the thread you are covering:

I have no way of knowing, but I suspect the usual split chain must not have be around when this book was written in 1924 or else they would have shown that.  This is a cool little knot.  Unlike the split chain which is done in two passes (you have to pull two loops through the space to create the finished knot) this one only takes one pass so it’s a bit easier and faster to make.  The big difference is that the split chain ends up looking like the normal tatting stitch, where as this one doesn’t.  Also, with the split chain the threads that wrap around the core thread fall into place naturally as you do the knot.  With Knot Tatting you have watch and guide them into place a bit more.  It’s slightly easier for it to get unruly.

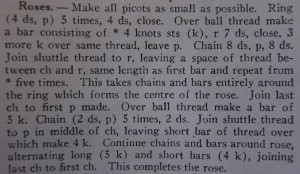
Each one of those “spokes” on the rose is made up of a series of these knots.  About half way through I was frustrated and sick of them, but by the time I finished I’d gotten a little more comfortable with doing them and I was so pleased with the way it looked I’m sort of ready to try another.  Maybe not right away though.  Here’s the instructions for the rose.

I recommend starting with the Continuous Thread Method (CTM).

R 4(-4)x5

Second round:

Over the ball thread, do 4 knot stitches (I’m calling them ksts in these instructions)

R 7

Ch 3ksts over ball thread leave picot, Ch 8-8

*Join shuttle thread to next picot on center ring leaving space.

Ch 4ksts

R 7

Ch 3ksts, pick up ball thread, leave picot, and Ch 8-8*

Repeat between *’s around the center ring then join to picot at top of first spoke.

Third round:

Ch 5ksts over ball thread, leave picot, Ch 2(-2)x5

**Join shuttle thread to next picot on round 2, leaving space.

Ch 4ksts, pick up ball thread and Ch 2(-2)x5

Join shuttle thread to next picot on round 2, leaving space.

Ch 5ksts, pick up ball thread and Ch 2(-2)x5**

Repeat between **’s around.  You’ll be making 4ksts on top of all picots in chains and 5ksts on top of all picots above spokes.  Join to picot at top of first spoke.

WHEW.  It won’t really make sense until you try it, but hopefully it’s sort of clear once you’ve got thread in your hands.  It took me quite a while to get this little rose finished, but by the time I did I was getting more comfortable with the knot stitch.  In the first round I was getting a bit frustrated with the way it was coming out because I was having trouble keeping it even, so I did a couple spokes in the normal split chain to compare them.  The knot stitch is faster, but a bit harder to keep even. This little rose certainly gives you plenty of practice with it.

This rose and the leaf motif from Tuesday are part of a large centerpiece.  The final piece has 109 rose motifs.  109! That works out to about 9,000 knot stitches.

I don’t know if I’m up for doing that many.  I might decide that life is just too short to spend my time doing knot stitches, but I do really like the way this rose motif came out and do like the little leaves.  Maybe I’ll just do a couple of smaller pieces with just one rose and the leaves around it.  Here’s the full centerpiece.  Enjoy it now, it might be the only time you see it on my site.  🙂

Comments (18)